
It’s certainly been said before, but it bears repeating: Adobe Photoshop has revolutionized the image-editing world — if not the world at large — and has penetrated far and wide into the software armory of architectural professionals and amateurs alike. It is an indispensable tool that has become synonymous with any form of image-based editing, and while it is relatively straightforward enough to pick up at the start, it takes time to discover the hundreds of features and facilities.
For architecture students and professionals alike, Photoshop can be an incredibly powerful tool for bringing renderings to life as well as sharpening up photographs of architectural models for presentation to your tutors or clients. Below is a brief selection of handy tips that are well worth knowing for a more efficient Photoshop workflow.
1. Layers and folders
Use layers and give them logical names. You can also place several layers into named folders and give each folder a colored highlight to help group your elements further. Folders make selecting and dealing with multiple elements far easier in large compositions.
2. Isolate layers
To focus on one layer in a complex file and hide all the others, hold down the Alt key and click on the layer visibility icon (the eye) for the layer you wish to work on. ‘Alt’ and click again to restore all the other layers.
3. Maximize your view
Pressing the F key will quickly cycle through Photoshop’s different screen display modes.
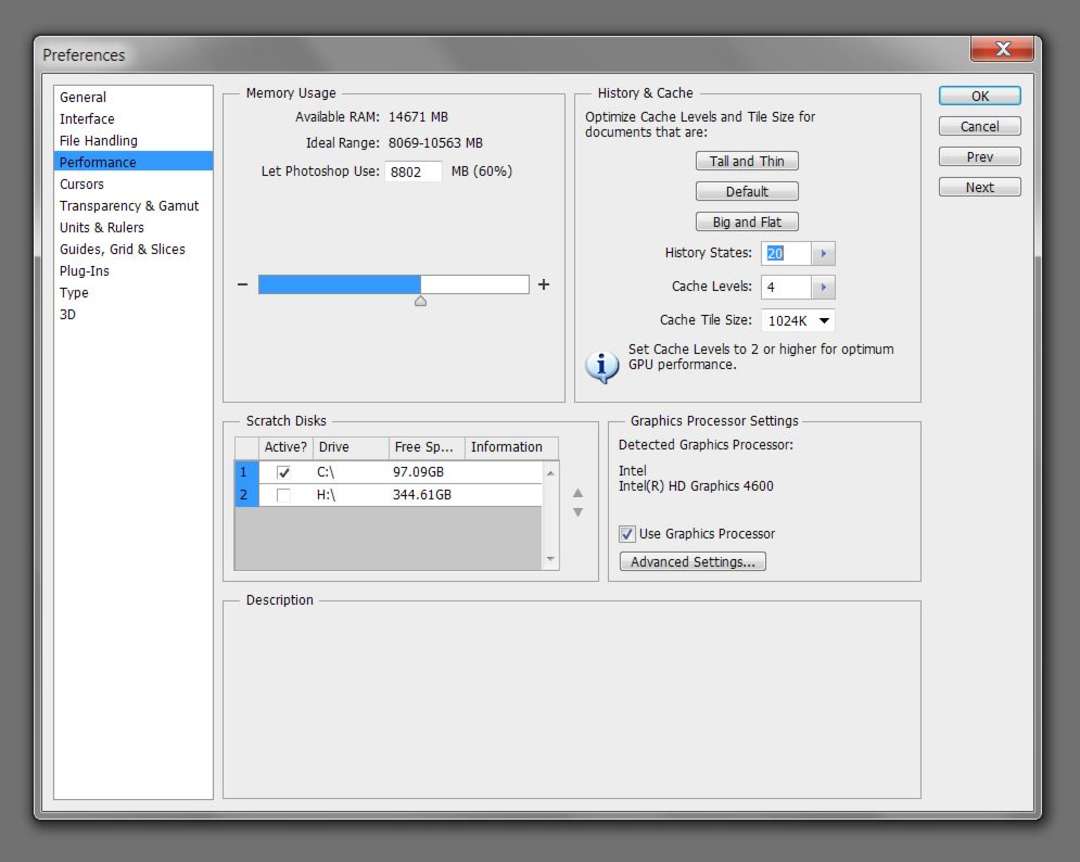
History states
4. History
You can view a list of the changes you’ve made to your file in Photoshop’s History palette. Selecting any one of these recorded changes will undo the file to that particular state. Selecting the most recent one will redo. You can adjust the number of history states that Photoshop remembers in Edit > Preferences > Performance.
Save often and consider saving incrementally to ensure you have backup files, which you can revert to if your current save becomes corrupt.
5. Batch process
If you are doing a repetitive task (such as resizing or reformatting an image), you can use Photoshop’s Image Processor (File > Scripts > Image Processor) to batch-convert multiple files automatically. Simply specify the source location of the images you want to use, the settings you want to implement and an output location for the end result.
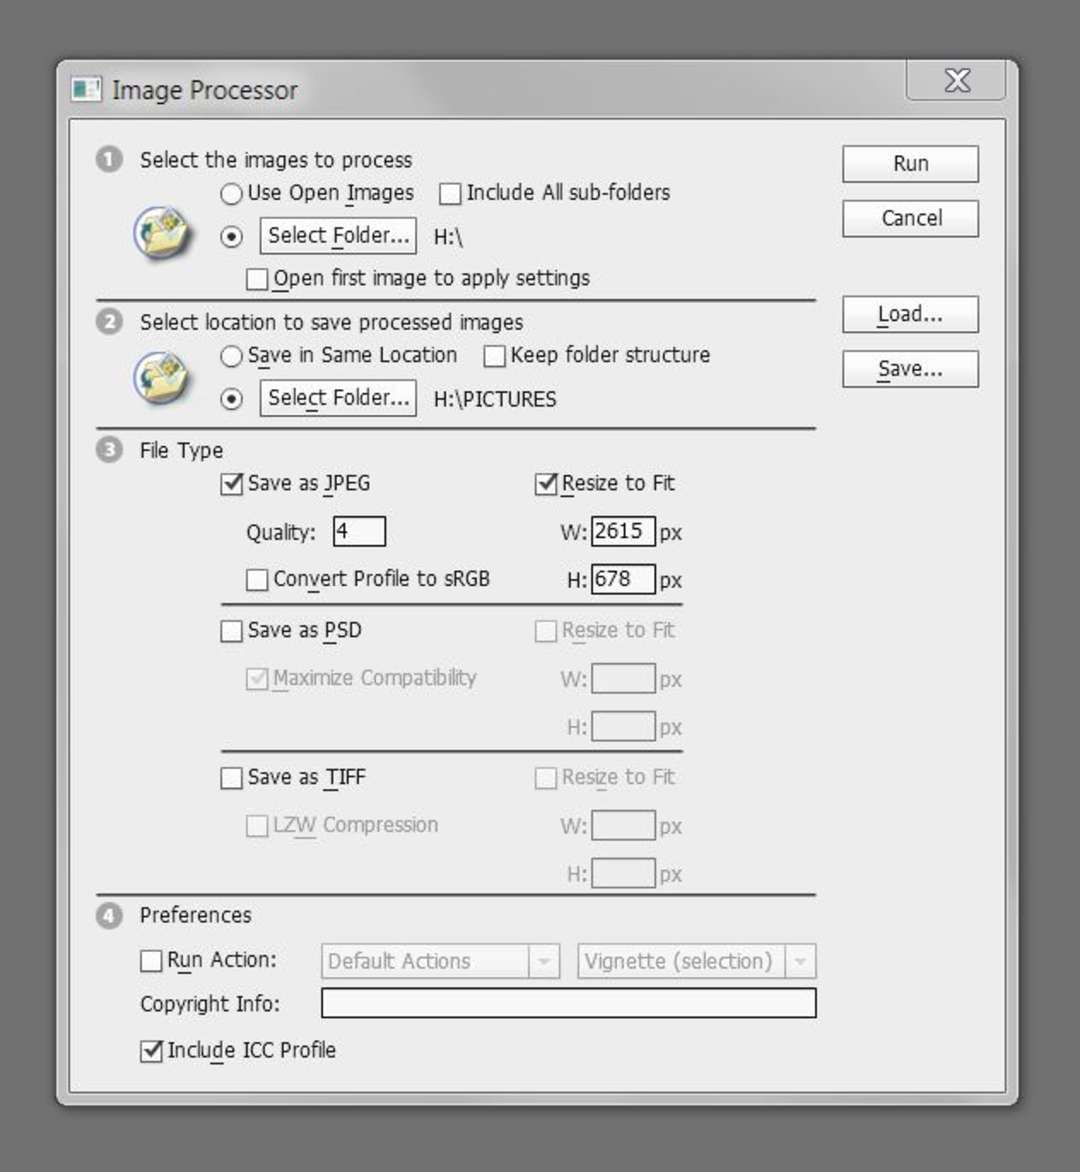
Image Processor
6. Actions
Photoshop’s Actions palette (Window > Actions) goes further than the Image Processor by allowing you to repeat a string of adjustments and changes to multiple images. Start recording and perform all the necessary adjustments to your image before stopping and saving your new action. You can then run this action on other images to repeat the exact adjustment steps time and time again.
7. Match Color
If you are trying to achieve a certain look in an image and you have a precedent image as a concept, you can try Photoshop’s Match Color feature (Image > Adjustments > Match Color) to apply its color tones and palette to your image. Select your concept image as the source file and experiment with adjusting the Luminance, Color Intensity and Fade values to see the result on your work.
8. Brush straight
To draw straight lines with the brush tool, simply hold down the Shift key as you draw. You can also click on your canvas with the brush tool and ‘Shift’ held down and then click elsewhere to draw a straight line between those two points.
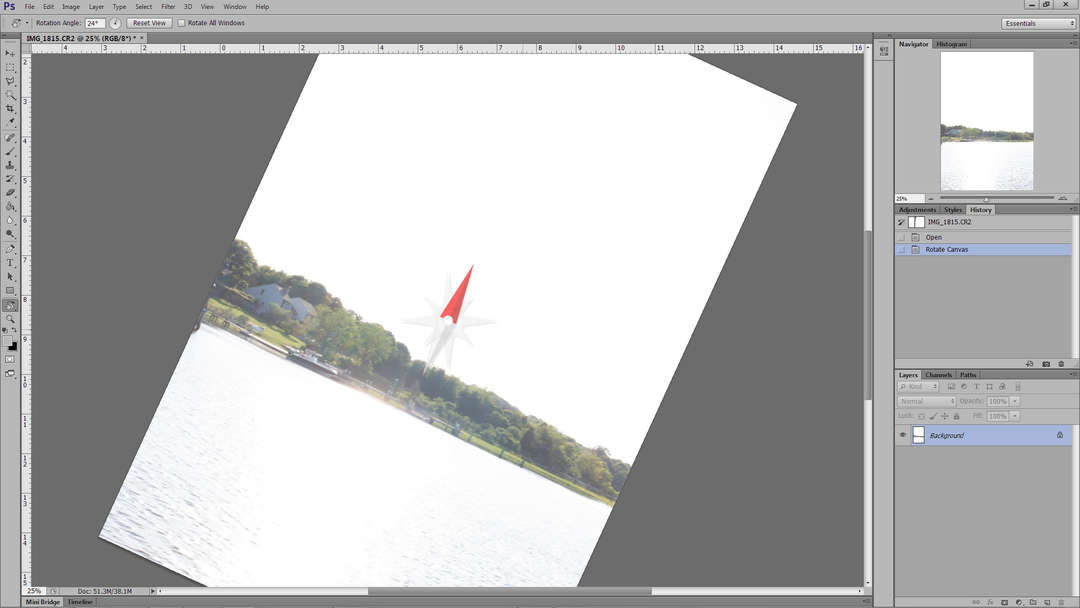
Rotate Canvas
9. Rotate your canvas
Instead of tilting your head (and wrist if you are using a graphics tablet), you can rotate the canvas temporarily by holding down the R key and rotating with the mouse. To revert to the original orientation, hold down R and click on Reset View in the toolbar.
10. Non-destructive editing
Part of the beauty of Photoshop is its non-destructive editing capabilities. Use layer masks, which operate in alpha channels, to control which parts of a layer are visible and which parts appear erased. Once the layer mask is enabled, use the brush tool with a pure black (RGB 0) value to erase content or a pure white (RGB 255) value to bring it back. Any color in between these values will erase or replace content to varying degrees, and you can also adjust the brush’s opacity, size and hardness to alter the effect.