
Unlike new build projects, a renovation project offers unique problems. Building orientation or proximity to surrounding buildings or vegetation can influence exposure rates of different elevations. Additionally the impact of the weather changes with site location, and all of this means that simple U-value calculations (which are a static processes) cannot fully assess, and account for, all the variables unless a full hygrothermal analysis is completed using appropriate modelling software such as WUFI or DELPHIN.
Full hygrothermal analysis, and the associated costs, can be daunting but it is possible to incorporate some basic products and design principles, which will ensure a robust and condensation free construction.
Specifying a basic vapour control layer as close as possible to the inside is key as it limits the amount of water vapour that can enter the structure. Using a moisture vapour variable membrane such as Steico Multi Renova or Pro Clima Intello Plus ensures that any potential moisture trapped within the fabric can migrate back to the inside during warmer periods. This is particularly relevant for renovation projects as it significantly limits the possibility of moisture forming close to the structural timber elements.
External ventilation is also key. This can be 50mm of ventilated airspace within the rafter depth or an external counter batten. This ventilation ensures that any moisture naturally evaporates from the outside face and hence the overall structure remains condensation risk free.
When considering the make-up of a replacement roof what insulation should you use?
There are many types of insulation you can use and there are some that we would suggest you really should not. We always encourage people to move away from the seemingly high performance PIR foil faced foam insulations partly to reduce the use of plastics and because they rarely perform as they should or create spaces that are particularly comfortable. Their imperviousness to moisture can be an issue in older buildings and when they shrink the performance of the roof decreases. We would strongly recommend that you use only vapour permeable insulation within your roof, which typically means some form of wool/fibre type product between the rafters with more above, or below. Compressible and flexible products work best between timbers they are self-supporting as they are friction fitted between the timbers, this ensures there are no gaps, and you have a tight fit. Other insulation benefits to consider are acoustic insulation and thermal mass. Higher density insulations, such as wood fibre, absorb sound very effectively, ensuring the space within the roof is quiet. They also store large amounts of heat and can be used to shield spaces from hot summer sun as well as retain heat during the cooler months.
Where are you going to add the insulation?
Between and above the rafters?
Quite often in older buildings, the existing rafters are not deep enough to only add insulation between and achieve the levels of insulation required by Building Control. If you plan to re-cover the roof, this would be the time to add external insulation. Adding insulation above the rafters during this process is very simple and can mean that you do not need to use a breathable membrane over the rafters (as wood fibreboards do the same job) which is particularly beneficial if you have bats. However, this does mean that the roof covering will be uplifted by the thickness of the boards, which may not be an option on a semi-detached or terraced house, unless you have the brick party walls protruding through the roofline. Using the flexible wood fibre insulation such as Steico Flex between the rafters and an insulation board, such as Steico Special Dry, above the rafters gives the best performance overall. These boards change temperature very slowly and resist the high temperatures from the sun in the summer months, preventing this heat from entering your roof space, keeping it cool. See more below. They also retain heat and buffer sudden drops in temperature in the winter months.
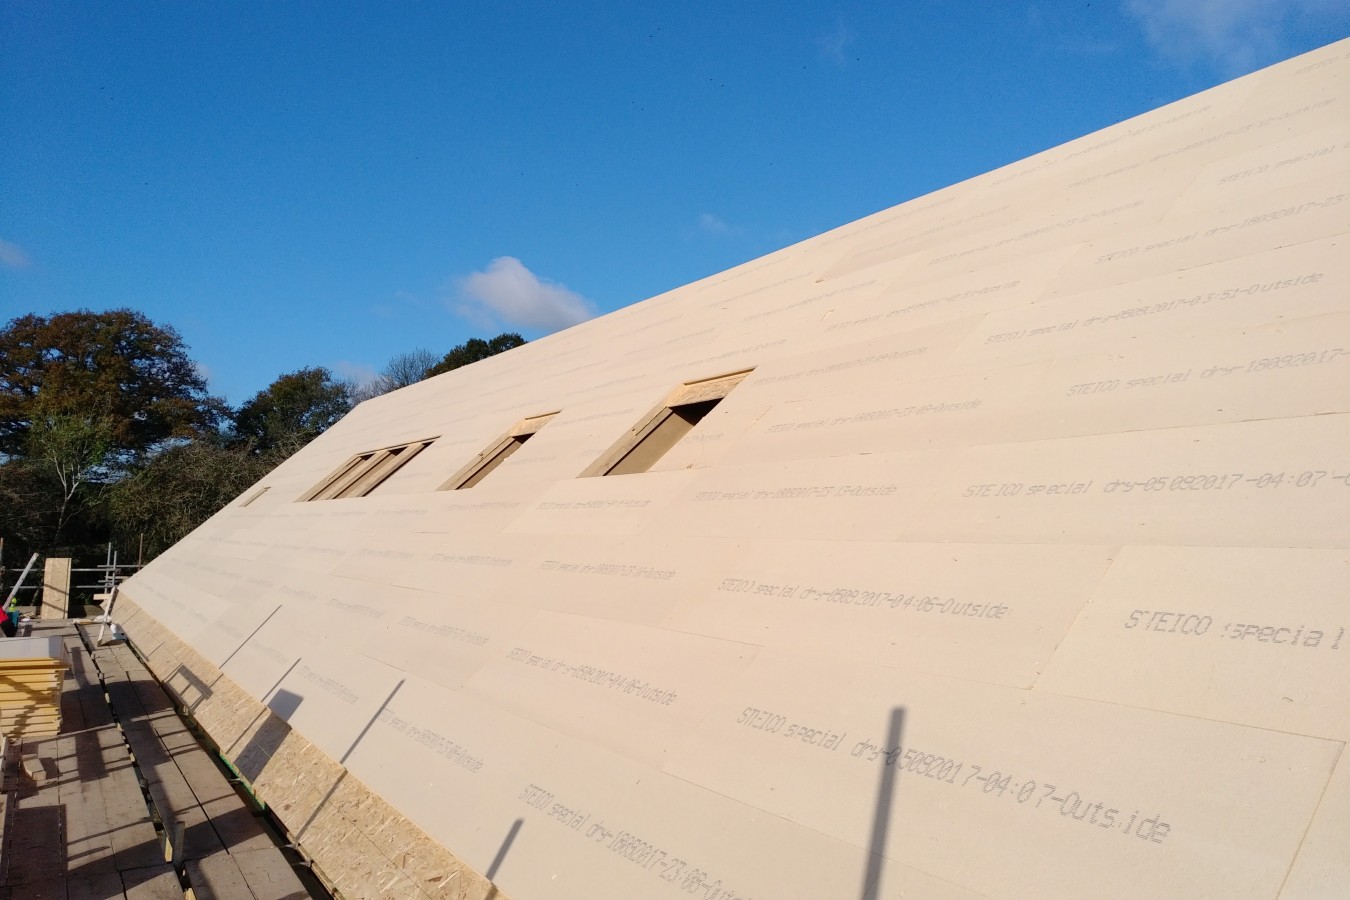
Refurbishing a roof externally with wood fibre insulation
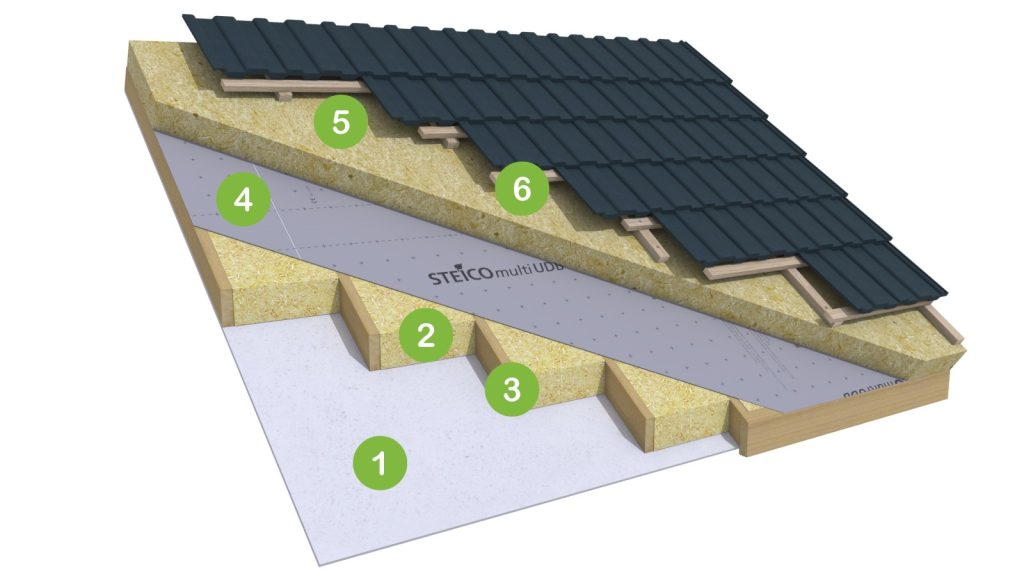
- First, remove any old inefficient insulation. The living space can remain unaffected by the work. Attic rooms can still be occupied.
- Install flexible wood fibre batts between the rafters (3) which offers excellent protection against cold in winter combined with maximum heat protection in summer.
- Existing rafters.
- Installing a breather membrane means water vapour can pass through the structure but convected airflow is removed.
- Install external sarking and sheathing boards above the rafters to protect against rain, wind and snow and can be temporarily exposed to the elements.
- Batten and counter battens provide external ventilation layer beneath the roof tiles.
Between and below the rafters?
If you do not plan to re-tile or slate your roof, or cannot alter your roofline, then the only option would be to insulate between and below the rafters. You can still achieve the same U-values, same levels of acoustic insulation etc. but this may mean that internal head room is impacted. This can be critical for internal applications so overall thermal performance should be balanced against overall cost of insulation and usability of the internal space. The achievable performance can vary greatly depending on the existing structure.
Refurbishing a roof internally with wood fibre insulation

- 12.5mm plasterboard
- Vapour control membrane – moisture vapour variable
- 50mm flexible wood fibre with battens @ 600mm centres (the amount of additional insulation below the rafter needs careful consideration based on the points raised above)
- 50mm flexible wood fibre with cross battens @ 600mm centres
- 50mm flexible wood fibre @ 400mm centres (38 x 100). Allows for 50mm ventilation zone within the rafter depth.
- Bitumen felt above rafter, battens and tiles
What if you have an old, non-breathable felt roof covering? In this instance, you need to make sure that you have at least a 50mm gap between any insulation in the rafter zone and the underside of the felt, see point 5 on the illustration. You will also need to ventilate at eaves and ridge level to ensure there is enough air movement to carry away any moisture. The rest of the insulation is then fixed below the rafters as necessary to achieve the desired U-value as illustrated.
Insulating a loft with wood fibre insulation
Even if you are not looking to fully renovate the pitched roof to create a habitable space, the inclusion of a natural wood fibre as a loft insulation has some key advantages over more traditionally used insulations.
The simple build-up below provides a very thermally efficient solution as it meets new build standards. It is also easy to use, as Wood fibre does not need any specialist protective equipment to install and does not collapse or slump over time. Coupled with the fact that it stores a significant amount of carbon this approach future proofs your home.
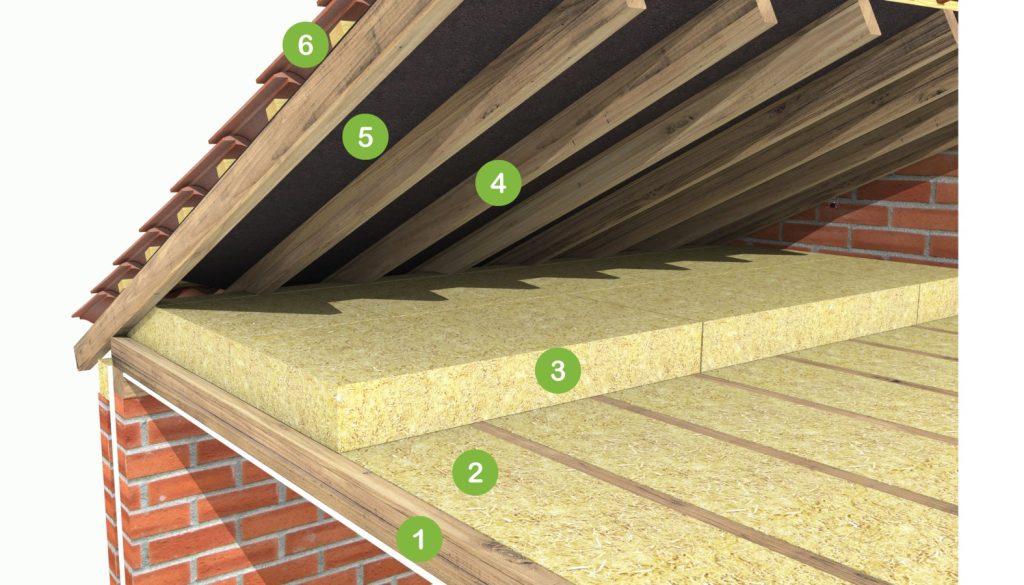
- Existing ceiling joist
- Infill with Steico Flex flexible woodfibre batts
- 140mm of Steico Flex woodfibre batts laid across existing insulation
- Existing rafter – 50mm of ventilation is required within the rafter depth where the insulation is laid between the rafters at the eaves
- Existing roofing felt
- Existing roof tiles
Heat protection?
Although we generally think about insulation as a way of keeping buildings warm during the winter, the right type of insulation can also keep it much cooler during the summer months. Overheating has become a much more prevalent issue in housing as the new Part O (Overheating) approved document of the Building Regs lays out. Although not explicitly mentioned in this new regulation, the ability of the building fabric, and particularly the insulation material, to delay heat transfer can play a significant role. This process can be calculated and is called Heat decrement delay or ‘Phase shifting’.
The interesting, and often baffling, aspect of this phenomena is that structures which show a very similar U-value can have vastly different performance values during hotter periods. This is because U-values purely consider the ‘Thermal conductivity’ of a material, and not the Density or the Specific Heat Capacity. These values contribute to a products ability to both store and ‘buffer’ heat and delay its progress through the structure. Allowing for these two additional product characteristics means that we can properly assess the efficiency of a structure.
The images below show a roof make up of 240mm overall thickness with a variation in decrement delay (phase shift) achieved only by changing the insulation type, the thickness and overall section U value remain the same but the difference in phase shift is 5 hours between the maximum at 12 hours and the minimum at 7 hours. The overall U-value is the same at 0.17 W/m2K.
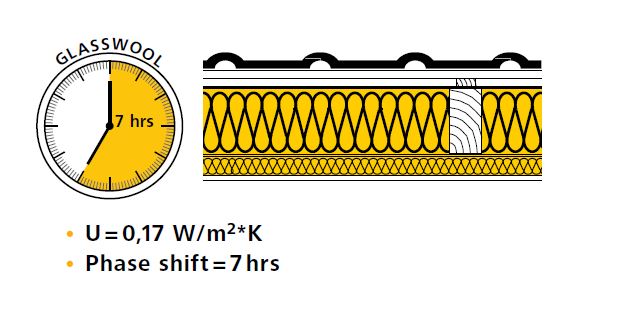
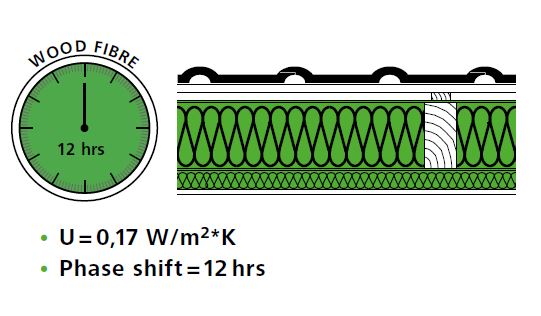
Achieving this key performance value of 12 hours means that you can essentially delay the transfer of warm summer heat through the roof and limit its ability to influence the internal temperatures. Internal temperatures stay low even during the hottest periods. When specifying insulation material you should always look for a U-value, condensation risk and heat protection value. This ensures that the structure works all year round and properly assesses the impact of external temperatures on the occupants of the building.
Do you need a vapour control layer if all the insulation is breathable? Yes. Always. Whenever you insulate you need to restrict the flow of moisture so that you do not create a situation where the levels of moisture within either the insulation or the timber rafters reaches damaging levels.
Winter is when most of this condensation would occur but also when it will dry out the slowest and with a well-ventilated structure, you can get damaging levels of moisture accumulating, even in wood fibre insulation. Vapour control layers do not have to be membranes, they can be plasters or OSB3, and are distinct from vapour barriers, which are effectively a complete vapour block. Vapour control layers slow the flow of moisture, not block it and in certain circumstances vapour barriers may cause a build-up of moisture, rather than prevent it. This is because vapour barriers block the movement of water vapour in any direction. A poorly installed vapour barrier will let water vapour through but then trap it within the fabric. This can lead to long-term degradation of both the insulation and even the structural timber.
What U-Values should I target? For existing domestic roof structures that are being refurbished, you should target a U-value of 0.18 W/m2K as a maximum. The new Part L of the Building Regulations is targeting even lower than this at 0.15W/m2K as they continue to try to improve the standard of our existing housing stock. You can go lower if you wish but unless you are insulating your walls as well, it is probably not necessary.
Choosing and specifying wood fibre for your roof renovation will help you build spaces that are both warm in winter, cool in summer and quiet, even in urban locations. Natural insulations also bring with them other benefits in particular by acting as a carbon store locking away the carbon in the building structure making it a perfect choice for carbon friendly construction. We are all aware of the rising cost of electricity and gas and anything that we can do to limit our usage can have a significant financial impact. Using natural wood fibre based materials also ensures a robust long-term solution, which limits our impact on the environment.
For more information on using natural insulation materials of all types or Steico wood fibre insulation for roof construction please call Ecomerchant on 01793 847 444 or visit www.ecomerchant.co.uk. Also visit www.steico.co.uk